Showing posts with label tips. Show all posts

Thursday, May 22, 2014

French Horn Tips & Tricks

Holding a French horn
Holding the Instrument
When playing the horn, place the edge of the bell on your right knee and bring the horn to your lips.  Never lean forward to play it, and don't pick it up and hold it so the bell is pointing directly to the right.

Using the Right Hand
The right hand is always placed inside the bell; this is a characteristic of the French horn that has remained throughout history.  Usually younger students are told not to worry about their right hand since they have smaller hands, but more experience players who would like to play with good intonation will have to learn. The hand should go comfortably inside the bell, curved with the inside and not blocking it. The sound is muffled if you block the bell.

Single vs. Double Horn
A single horn can only play in F, whereas a double horn has extra tubing that allows it to play in both F and Bb.  (A thumb trigger switches between the two sides.)  This extra tubing makes it heavier and much more expensive.  Students usually start on a single horn because their repertoire isn't advanced enough to require the extra notes.  However,

all experience horn players will need to be able to switch between F and Bb.  The music store I go to doesn't rent double horns for this reason; they only sell them.

Cleaning out the Instrument

Mrs. Harvison showed me how to get the spit out of a French horn.  It requires emptying four different tuning valves since there isn't a spit valve (unlike other brass instruments.)  Take out the tuning slide one by one and shake them.  There’s a special wrist maneuver to perform with one that’s particularly curvy.  It's important to keep the valves pressed down while inserting and removing the slides in order to help with the pressure.  I've also seen a French horn player I know spin his French horn while he's holding it to distribute the spit.  This must make it easier to clean out later.

Embouchure
French horn requires a lot of stability in the lower lip and a small embouchure, so clarinet players are often good horn players.  Clarinet has a firm embouchure, especially in the bottom lip, and a strong foundation is essential with French horn.  (This was probably why French horn is easier for me to play than trumpet.)

French horn embouchure
Since the French horn embouchure is so small, it also tires easily at first.  If you find yourself unable to get notes out, no matter how hard you try, you should put the horn down for a few minutes and go do something else.  It happens sometimes.  Then, once you've rested for a bit, go back to playing.

As you play higher, the hole that you’re blowing air through gets smaller and your lips get tighter.  The lips are looser for low notes.  Mrs. Harvison suggested directing your air upwards and focusing on a point above you to help get the higher notes out.  Singing the note or hearing it in your head before you play it also helps.  (Yes, I just admitted that singing can actually help!)

Finally, becoming familiar with the embouchure is very important to playing music correctly.  Since the partials are so close together, it’s easy to start on the wrong note.  One of the first things to teach kids on French horn is to instantly start over if you don’t get the correct starting note.  If you don't start on the right note, the whole song could be thrown off.  Teaching students to reset their embouchure if they don't start correctly teaches them to listen to the other parts in the band and helps them develop and become familiar with their embouchure.

Wednesday, May 21, 2014

Trombone Tips & Tricks

The trombone was one of my easier instruments.  It may not look like it, but the size of the mouthpiece made it very user friendly for me.  This makes me understand why some beginning middle- or high school band students are put on baritone.  It has the big mouthpiece, but being in tune is easier because it has valves, not a slide.

Assembling and Holding the Instrument
Insert the end of the slide (the opposite side of the mouthpiece) into the slot in the body of the trombone.  Line up so it's at a 90-degree angle, with the mouthpiece slot to the right of the trombone.  Bring the tightening mechanism (not sure of the official term) up and repeatedly spin counterclockwise to tighten.

The main body of the trombone rests on your left shoulder.  The slide should be to the right, close to parallel to the ground.  With your left hand in the shape of an "L", put your thumb on the trigger with your pointer finger on the metal bar closest to the trigger (assuming that your trombone has one.)  You can also hook your finger around the second metal bar to hold up the slide.  (I learned the hard way that this is necessary - everyone loses control of the slide at some point in time!)  Your right hand holds the metal bar

Slide Positions
  • 1st - slide all the way in - main tuning note
  • 2nd - in between 1st and 3rd
  • 3rd - hand touching the bell
  • 4th - metal part of trombone even with bell
  • 5th - a little farther
  • 6th - arm comfortably extended
  • Click to zoom
  • 7th - really reaching out
There can be multiple slide positions for each note, in the same way there are multiple fingerings for some notes on the trumpet.  Also, the number of slide positions used decreases as you go higher.  For example, the low end of my range uses 7th to 1st position.  Then I run out of ways to make the slide shorter, so I have to go up a partial and start at the lower positions again.  Only this time, I don't start at 7th.  I start at 5th.  This continues as I get higher and higher; soon, I would only use 1st through 3rd position.  Here's a diagram to further explain what I mean.

Intonation
Intonation can be tricky on the trombone because there aren't valves or keys.  Therefore, it's important to have a good ear and always be listening to everyone around you.  Mr. Klepacki puts our trombone next to the baritones because they have valves and are more likely to be in tune, so the trombones can listen to them.  Their sound is also similar, which helps.

Some slide positions are more stable than others.  1st position is stable because it's as short as the instrument can go.  It provides the most reliable tuning notes.  Also, intonation tends to be off (particularly flat) in the higher positions.  This is because students don't do as good a job as estimating where the slide should be.

Trigger
Some trombones come with a trigger which allows access to extra tubing.  This extends the range and allows for more flexibility.  (A trigger becomes necessary for advanced players.)  At first, my finger hurt from holding up the trombone at the trigger.  I'm not sure if this happens to many players.  Maybe I was putting too much weight on it.  It stopped hurting eventually, so I must have gotten used to it or stopped doing it.

Instrument Size
Elementary school students often have a hard time playing the longer slide positions, such as 6th and 7th.  It's important not to let them get discouraged because of this.  Make sure they know those slide positions exist and are comfortable with the others so they can start playing 6th and 7th position when they grow and their arms get longer.

Tuesday, May 20, 2014

Percussion Tips & Tricks

While my time with percussion was short, I did learn a few important things about being part of an ensemble's rhythm section.

Percussion is so much more demanding than other instruments. It’s why percussionists are more dedicated further on in their music careers.  If needed, elementary school teachers sometimes "weed out” prospective percussionists by having them do hand-eye coordination exercises.

Holding the Sticks/Posture
Holding a drumstick
Mallet sticks you can hold naturally, but snare drum sticks are difference.  You put your thumb parallel to the stick near the bottom.  This is the “pivot” point, for lack of a better term.  Your pointer finger hooks around the stick, and this gives it a lot of room to move while still being able to control it.  This is crucial, because the drum won’t make a good sound (and you won’t be able to roll) without this freedom of motion.  It’s hard to explain, and I wish I had another lesson to confirm it all.  I had to keep correcting my grip, but I think I’m getting it now.

You should stand a comfortable distance away from the drum, like you’re holding a cafeteria tray. Stand up straight, right in front of the drum, with your feet a comfortable distance apart.

Rudiments (Patterns)
The pattern L-R-R-L, etc. or R-L-L-R is called a paradiddle. Strong hand lead is starting a “phrase” with your strong hand (right hand in my case.)
Example of strong hand lead
I would start each phrase (after the rests) with my right hand (or left hand, if I’m a leftie), instead of strictly alternating hands. It feels natural, like stopping and resetting after you speak a sentence. A way to remember when to do this is to count the rests as if they’re beats. I could hit the air with my left hand during a rest and land on my right hand for the next note, just like is written.

Buzzing isn’t quite rolling, but it’s a good introduction. It’s represented on the staff by a z on the note. Basically, you let the stick bounce off the drum repeatedly and apply downward pressure on it so it vibrates quickly. (A roll, I think, is simply a lot of these put together, but I didn't have the time to learn a drumroll.) You have a lot of control over how fast the stick hits the drum.

How to stand when
playing snare drum
Flams are like grace notes in music - they come just before the beat as decorations. You hold the sticks at slightly different heights above the drum and let them fall at the same time. It’s slightly harder than it sounds. A good habit to get into is letting the momentum switch the sticks’ positions. So if you start with the left hand higher, you should finish the flam with the right hand higher before resetting your sticks.

Technique
You shouldn’t hit snare drums in the middle.  There’s a sweet spot about halfway between the middle and the rim; hit it there.  Also, young percussionists have a tendency of “hammering” their sticks or mallets (lifting them too far above their head.)  This decreases accuracy and tone quality. There should be minimal wrist movement while playing.  If a quarter on the back of your hand doesn't move, you’re good.  If it’s moving, you need to change something.  Keeping the wrists still allows the sticks to bounce off the head of the drum.

Monday, May 19, 2014

Oboe Tips & Tricks

Oboe is a very difficult instrument to master, so there was a lot for me to learn.

Embouchure
Embouchure, as suggested
by Standard of Excellence
Oboe utilizes a "double embouchure".  Both lips are curled over the teeth to create a cushion for the reed.  This allows the reed to vibrate since it's a flattened tube that doesn't use a mouthpiece.  I read you should your lips under to the point where you can't see them anymore, but I've learned that isn't necessary.  It wears out your embouchure, and the reed plays just fine without doing it.  Plus, my Standard of Excellence lesson book says you should close your lips in a "drawstring fashion", but I think that's misleading.

Musicians who play other instruments need to build embouchure endurance.  When I first started playing, my lips got tired of staying in the same unnatural position for so long.  They would try to unfurl and revert to clarinet embouchure, with one lip partially curled under.  But I got used to it with practice.

Posture
The oboe needs to be held farther away from the body than the clarinet.  The angle between the instrument and your body is greater.  This allows the reed to go straight into the mouth, which helps it vibrate.  If it's at angle, it will affect the pitch.  Other than this, posture is the same as clarinet.  Sit up straight with your feet flat on the floor and your back away from the chair.  Your hands are comfortable at your sides.

Reeds
Oboe reeds are REALLY fussy.  Many serious oboists carve their own reeds so they can personalize them and guarantee they'll play correctly, but I didn't have time to learn that.  I ordered my reeds online, so I was constantly at the risk of buying a bad reed.  All woodwind reeds have their imperfections, but there are more possible double reed imperfections, and they have a greater impact on the reed's performance.  If a reed's opening is too big, the pitch will be flat.  If the opening is too small, it will be sharp.  Either way, it's hard to play.  You can try squeezing the reed to try to get it to open or close more, but it's tedious and not guaranteed to work.  I've bought four reeds this year, and two didn't work right off the bat.  (Another I dropped and chipped two minutes after arriving home.)

Intonation
Blue = fully covered hole
Green = half-hole
The reed can present its own intonation problems as stated above, but, like other instruments, embouchure plays a big role in keeping the instrument in tune.  One way to adjust the pitch is changing how much reed you have in your mouth.  More reed will make the pitch go down, and less reed will make it go up.  I've noticed the angle of the instrument changes the intonation, too.  It takes a lot of practice to completely play the oboe in tune, and I'm surprised I've gotten as far as I have.

Fingerings
One difference between the oboe and other woodwind instruments is the "half-hole".  I don't know why the oboe requires it - it's similar to lifting your pointer finger for some notes on the flute.  In fact, it's the same notes.  Younger students tend to pick their finger up and put it down again when moving from a half-hole to a full fingering.  This isn't good, since they might have to do it quickly.  The key is rolling your finger.

There is a seemingly infinite number of alternate fingerings for the oboe!  For example, Bb in the staff has 9 possible fingerings (including trill fingerings that shouldn't be used for anything other than trills)!  It makes me wonder why the oboe, of all instruments, needs this many alternate fingerings and other instruments don't.

Finally, there are some extreme similarities and differences between the oboe's fingerings and the clarinet's (half-hole aside.)  There are just a few weird differences, such as F and F#.  The fingerings for clarinet are almost switched on oboe!  I posted a diagram of the differences earlier, but here it is again.

Monday, February 10, 2014

Flute Tips & Tricks

Flute posture
The flute was a different experience than any other instrument I learned so far.  Trumpet was completely new, and saxophone and bass clarinet were very similar to what I already know; flute was a combination of familiar and unknown.

Posture
Proper flute posture involves sitting up straight and holding the flute so it's close to parallel to the floor.  I'll admit my flute wasn't completely parallel, but I wasn't hunched over the instrument like some flautists in band tend to do.  A good way to summarize good posture is, "Bring the flute to you; don't bring yourself to the flute."  Don't get lazy and rest your arm on the chair next to you or lean over so your arms aren't as high.  You'll eventually get used to holding your arms up if you keep practicing.

Embouchure
Flute embouchure
A flute makes a sound when the mouthpiece splits the musician's air column, resulting in a swirling pattern inside the instrument.  Therefore, it is very important to correctly place your lips on the mouthpiece.  If the mouthpiece is turned too far outwards or inwards, you can't produce a sound.  The lips should be pursed with the corners tight, as if they're pulled towards your ears (think of blowing air over your chin - it's a similar feeling).  This creates a "compressed" air column that's directed towards the mouthpiece.  Keeping a mindset of "blowing through a straw" helps a lot.  The edge of the mouthpiece should be touching the outside edge of the lip.  (It's perfectly normal to produce a very airy sound at first - you have to get used to the embouchure and mouthpiece placement.)

The flute can be turned inwards or outwards to slightly change the pitch of the note.  If a note is a bit sharp, roll the flute in towards your face to lower the pitch.  This comes in handy when playing lower notes; rolling the flute in a bit aids in getting the note to sound since it requires slower air.

I found it very helpful to watch my embouchure in the mirror as I was playing.  My embouchure tends to get tired after I've been playing for more than 20 minutes, so seeing it in the mirror helps me remember where it should be and improve my tone.

Octaves
Unlike other woodwind instruments, there is no octave or register key on the flute.  To play higher, one must blow faster, "cooler" air.  To do so, the embouchure must be tighter.  The opposite is true for low notes; relax the embouchure and blow slower, "warmer" air.  I've always heard Mr. Klepacki tell the flautists to pretend they're "cooling hot soup" for the lowest notes.

The higher notes may require more intonation adjustments; tighten the embouchure to raise the pitch, and relax it to lower the pitch.  Rolling the flute inwards may also lower the pitch slightly, but be careful not to lose the sound.

Dizziness
In elementary school, I always heard flautists complain about getting dizzy when they play.  As a clarinetist, I couldn't understand how playing an instrument would make you dizzy, but it's true.  More air is required to play the flute, so it's easy to get lightheaded.  If you do feel dizzy, stop playing and take a break.  Stretch, walk around, get a drink.  After a few minutes, once the oxygen has returned to your brain, you may continue playing.  With time and practice, you will develop the endurance to play for longer periods of time.

One cause for lightheadedness is exhaling too much air at once.  Air has no resistance on the flute, so it must be controlled by the embouchure.  Make sure your embouchure is tight and directed towards the mouthpiece (the same concentration as blowing through a straw.)  This will help your air supply last longer so you won't feel dizzy.

Instrument Troubleshooting
I discovered that it is possible to unscrew the dome-shaped cap at the head of the flute.  If this happens, the flute won't play properly (I learned this the hard way.)  Make sure it's always screwed in.

Friday, January 31, 2014

Saxophone Tips & Tricks

Posture
Saxophone posture
Saxophone posture can vary depending on the musician.  Like other instrumentalists, saxophone players should sit up straight with their feet flat on the floor, but they can choose how to hold the instrument while they're playing it.  Younger players can learn to hold the saxophone so it's outside their legs.  (This is how most of our saxophone section plays.)  I'm assuming this is because they aren't big enough to hold the instrument between their legs.  I play with the saxophone rested between my legs on the chair - I'm just tall enough for it to work out.  It means I don't have to have the weight of the saxophone on my neck, which is nice.  I'm not sure if this is encouraged for elementary school students; that's something to figure out in April.

Saxophone embouchure
Embouchure
The saxophone mouthpiece was based on the bass clarinet's, so the embouchure is similar.  The mouthpiece goes straight into the mouth, unlike clarinet mouthpieces which are at an angle.  The bottom lip can be curled under slightly, and the top teeth should apply some pressure.  The chin is flat and pointed.  The higher notes require tighter embouchure and control so they will speak and be in tune.  The mouth and throat need to be open in order to play the lower notes, as if a golf ball is in your throat.  Dropping your jaw helps open up the embouchure.

Tuning
Saxophone mouthpiece
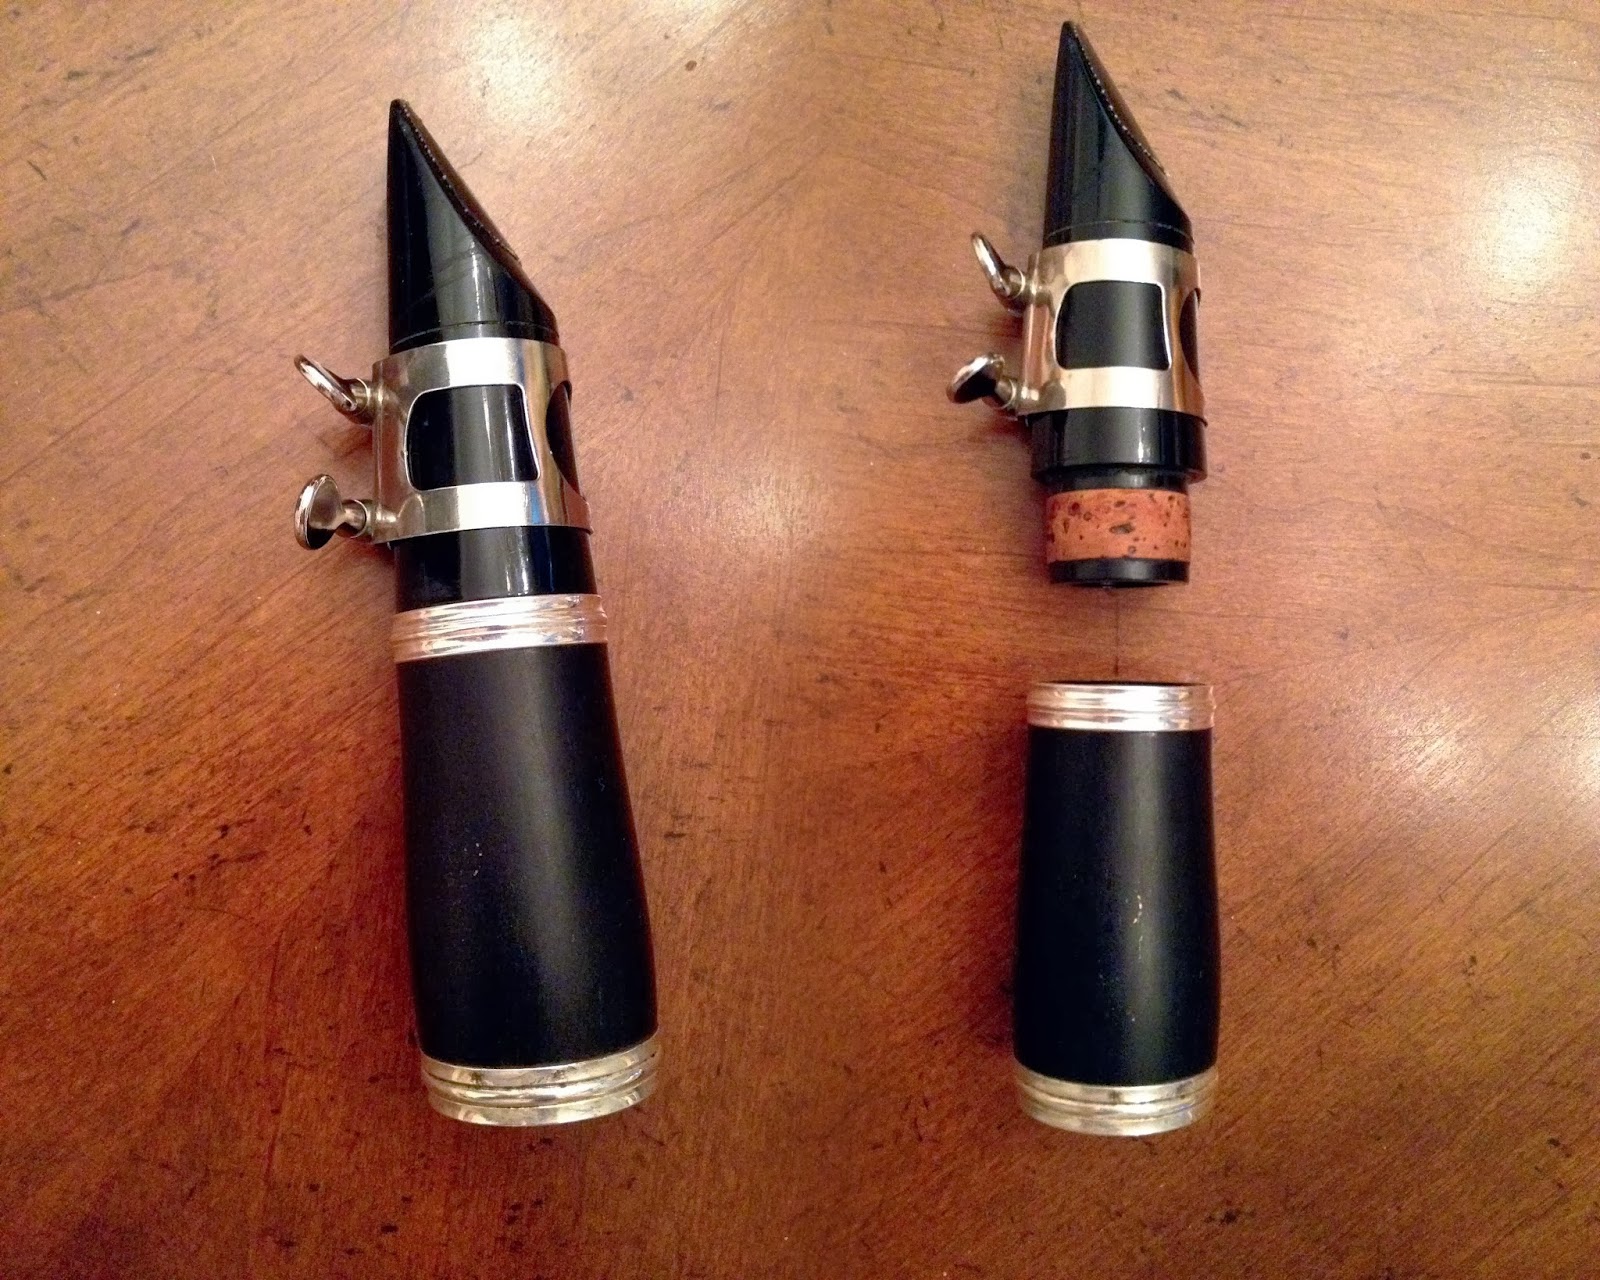
To me, the saxophone is notorious for being out of tune.  Fortunately, it can be easier to fix than on other instruments.  The mouthpiece of a saxophone is very different than other woodwind mouthpieces.  A clarinet or a flute is played with the mouthpiece pushed in all the way; there is no cork showing.  There is a definite "starting point" for tuning.  There isn't a clear "starting point" for saxophone.  The mouthpiece is placed on a piece of cork (it can safely rest on about 2 inches of it), so there's a lot of wiggle room.  You remember where to put the mouthpiece once you have some experience.  In the meantime, it's a good idea to tune before you play to ensure the mouthpiece is in the right place.  (My rented saxophone also has a red line drawn where the mouthpiece should be placed.)

Dynamics
Clarinet mouthpiece
Saxophones are also known for being able to overpower other instruments.  (I remember the saxophonists had to put socks in their bells to muffle the sound.)  They have to be able to fit in with all types of ensembles, so dynamic control is very important.  Some ranges (ie. the higher notes) are easier to play quietly than others (the lower notes), so you have to adjust your air support accordingly.  The lower notes require more support if they're going to be played quietly.

Wednesday, January 1, 2014

Trumpet Tips & Tricks

It didn't take me very long to realize how different brass instruments are from woodwind instruments.  The hardest part was adjusting to the embouchure.

Embouchure
I had listened to Mr. Klepacki talking to the brass section over the years, so I wasn't completely oblivious when I started learning brass embouchure.  My first actual "lesson" came from the Standard of Excellence book.  It had a great explanation, and I picked it up really quickly.  To find your mouth, shape the inside of your mouth as if saying "oh."  Then, bring your lips together as if saying "em."  The key is for the corners of your lips to be firm, but the center should be relaxed in order to create the buzz.  Your chin should be flat and pointed.  I discovered that buzzing relies on the firm lips; without them, I'd just blow air through pursed lips.  Mr. Klepacki also recommended offsetting your lips on the mouthpiece (60/40) to make it easier.

Partials
The Standard of Excellence book was written as if a student's first note could either be the C below the staff or the G in the staff.  I first played the C, so I had to work from there.  One of the most important things I learned was, "You have to play low to be able to play high."  The lower partial came fairly easily, but control is essential.  My lower partial was usually flat, so I had to lip it up.  This was done by adjusting my lips or chin.

I started moving up the C major scale once I could play below the staff.  C through E came fairly easily, but it took a while to get to the G.  After that, the new goal was the C in the staff.  The key is to tighten your lips and blow harder.  I couldn't try to estimate how much air I would need, because I would always be wrong.  Have no mercy.  I also found it helpful to put more pressure on the mouthpiece.  This aided in tightening my lips.  I don't know if a trumpet player should actually do this, but it worked for me.

Finally, I wouldn't be capable of my current range (a little under two octaves) without the practice time I put in.  Seriously.  Every little bit helps.  PRACTICE.  There's no excuse not to.  It helps your embouchure's strength and endurance so you can play higher and for a longer period of time.  You'll also have more control over the instrument.  Each note is different; one may be slightly flat for you, but the next will be sharp.  Muscle memory will develop faster with practice!

Posture
I realized the most beneficial posture isn't what I've seen the other trumpet players doing in band.  Most hold their trumpets down so the bell is in the stand.  I've heard how that muffles the sound, but I discovered that it actually makes the instrument harder to hold.  When I began playing, I naturally held the trumpet up.  My neck was straight, and it was a lot easier to exhale.  I tried holding the trumpet the way others do in band, but I couldn't.  My airway was restricted, and my arms were put in an awkward position.  Moral of the story: don't be lazy when holding a trumpet, even when you're just beginning.  It'll pay off in the long run.  As always, if you're not used to sitting up straight, don't give up.  Soon, you'll be sitting up straight without thinking about it.

Monday, November 11, 2013

Bass Clarinet Tips & Tricks

While the bass clarinet is similar to the Bb clarinet in several ways, there are also some key differences.

Embouchure:
The bass clarinet's embouchure has the same foundation as the Bb's, but it's more open.  The bigger mouthpiece takes up more space in your mouth, and a bigger reed needs more room to vibrate.  My embouchure on the Bb clarinet is tight and controlled, so I initially had trouble playing the bass clarinet.  I needed to get used to using more air and dropping my jaw more to get a good sound.

Posture:
I had to stack my case and several
books to get the right height.
Playing an instrument as big as the bass clarinet requires sitting right on the edge of the seat.  You must be able to reach the mouthpiece without tilting the instrument.  This may also involve raising or lowering its height.  Bass clarinets should use a metal peg to adjust the height.  (However, I didn't have a peg, so books worked just fine.)  The mouthpiece should go straight into the mouth, rather than at an angle like other clarinets, and the player shouldn't have to duck down or reach up in order to play.  Playing at the wrong angle will cause the reed to squeak or restrict air flow.

Reeds:
Bass clarinet reeds, like any other reeds, need to be wet in order to play properly.  However, they take a lot longer to get wet than other, smaller reeds since they're so thick.  I learned this within the first few practice sessions.  If a reed is not soaked properly, the tone will sound dry or airy, or some notes will have difficulty speaking.

Care:
The bronze metal shows how much I had
to adjust the length of the bass clarinet.
Big instruments have a way of breaking or leaking without the player realizing it.  I discovered this as soon as I put the clarinet in my mouth.  The instrument was about 25 cents sharp (I have no idea why), and I had to pull the neck out a lot in order for it to get in tune.  There are so many keys on the bass clarinet, and it's such a big instrument, so keep your instrument in good shape and have it serviced every year or so.  Your ensemble (and bass clarinet) will thank you.

Monday, November 4, 2013

Clarinet Tips & Tricks

Embouchure
Clarinet embouchure
One of the most important factors of a good tone on the clarinet is the embouchure.  Say "Whee", then keep the teeth and tongue formation and say "Too" with your lips.  The chin should be flat with the jaw slightly dropped to prevent bunching up the chin and corners of the mouth.  This is clarinet embouchure.

Clarinet embouchure varies slightly depending on the notes you are playing.  The chalumeau range requires a formation similar to saying "ou".  As you move through the throat tones and clarion range, it changes to "oo".  Finally, the altissimo requires "hee", a formation similar to hissing.  A bad tone often results from "saying 'ah'" when playing, or not properly adjusting the embouchure when playing over the full compass.

Altissimo
Correct posture
Atissimo (above the instrument's written b''') is the hardest range on the clarinet.  (Clarinetists don't learn altissimo until they have been exposed to the rest of the compass.)  It's hard to resist tightening the embouchure to get the notes out, but it makes them sound cut off or out of tune.  Keep the jaw dropped slightly and, if necessary, apply pressure on the embouchure by pulling the clarinet upwards.  It helps to play with a tuner in order to figure out where the embouchure needs to be to play in tune.  Eventually, muscle memory will replace working to find the pitch.  The instrument sounds very different when you're the one playing it, especially the highest notes.  They may sound squeaky and harsh to me, but in-tune to a listener.  Recording myself helps me solve this problem.

Posture
Good posture involves sitting up straight with feet flat on the floor.  The arms shouldn't be "pinned" close to the body since it creates tension, which can restrict hand movement and affect sound.  I've also fallen into the habit of scrunching up my right hand against the trill keys.  This usually starts when the player is young and their small hands can't quite support the clarinet properly, so they use the trill keys for support on their right hand.  This habit can later restrict hand movement.
My clarinet reeds ($23 for
a box of 10, but I never
use anything else.)

Reeds
Reeds come in a variety of brands (some better than others) and strengths.  Strengths range from 1 to 5 and have increments of .5.  Beginners usually start on a 1.5 and move up as their air and embouchure become stronger.  Reed size depends on the player and what they're comfortable with; you won't get a quality sound if your reed is too easy or too hard to play.

The final tip is how to place your reed on the mouthpiece.  Never put the reed on the mouthpiece before the ligature.  Ever.  It runs the risk of chipping the reed (there's nothing worse than ruining a good reed), no matter how carefully you maneuver the ligature.  Always put the ligature on first, then slide the reed in from the top.